Thursday, July 28, 2011

DIY Toilet Paper Art

Yup, our budget is so tight that we had to resort to using toilet paper as artwork! Haha just kidding. So on my newest blog that I stalk follow, I found a fun little post about using toilet paper/paper towel rolls as artwork. I was intrigued and definitely interested in making it work in our house somewhere since it sounded like an inexpensive project and definitely something easy and quick.

I bought these canvases at Joann's when they were 50% off so I think I paid $12 for the 3 pack and I painted them with leftover paint from A's nursery.


I cut up about 10 toilet paper rolls and 3 paper towel rolls into 1.5in sections (no we don't go through THAT much tp...I had friends collect them too!) 


I initially made the mistake of priming them before I glued them together. Don't do that...it's a pain in the butt. Glue first people! Know that these bad boys will soak up quite a bit more paint that you are expecting. Just FYI. So primer, then paint. Wait, wait. Glue, then primer, then paint!


After the paint was dry, I arranged them how I wanted and just used a bit of hot glue in the center to glue them to the canvas.


Super easy and cheap too! And now we have fun and unique artwork to complete our guest room! Just in time for visitors grandma.


Yay, the guest room is finally finished!

Wednesday, July 27, 2011

Twelve Months!

The day has finally come...

Baby, girl, you are officially a year old! Mommy got a bit emotional thinking back on this year and how much of a joy and blessing you have been to us. You are by far the best thing daddy and I have done and we are so thankful and proud to be your parents. We are STILL in disbelief that this year has gone by so quickly and that you are no longer our baby. Of course you will always be our "baby" but you are most definitely more a little girl these days. You are very independent and strong-willed opinionated about everything...not quite sure where you get that (haha). You are still so curious about everything and love to sit and watch what people are doing then try it yourself. You are extremely smart and it's crazy the things that you are able to understand and communicate to us. In the last month you started walking and now you are off and going! You've started "filling out" (or getting fat like grandpa says) but you are still our tiny girl. It's only appropriate that your first birthday party will be a Tiny Party and will be the event of the year!
 
You spent your birthday with just mommy and daddy doing lots of fun (and new) things:

pancakes with butter and a teeny bit of syrup for breakfast
(want some?)

messing up exploring daddy's man cave
(no daddy, it wasn't me)

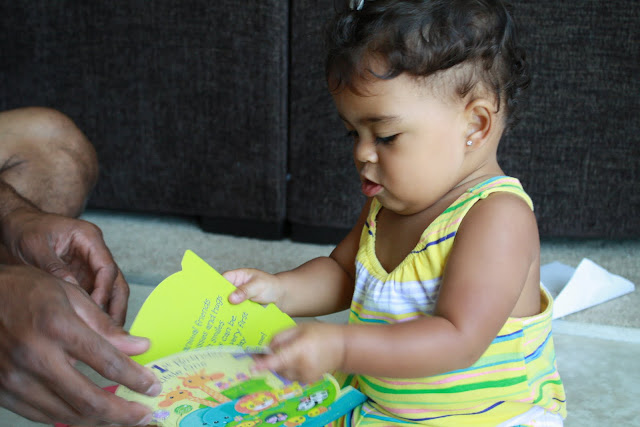
opening birthday cards
 (let's look inside...)

(aw, man, no money in this one)

helping daddy wash the cars
(this is fun, mommy!)

devouring sharing your first berry sundae
(I'm not sure what this is, but I LIKE it!)

& playing outside
(higher, daddy, higher!)

Hope you had a fun day!

Anayah, our prayer is that the Lord continues to have His hand on your life today and always. That you will grow up in His favor and His blessings will be showered on you daily. That your heart will be full of His love and your actions and character will show the joy He has given you. May you always know that we love you and are so proud to call you our daughter.


Happy Birthday our sweet baby girl!

Tuesday, July 26, 2011

Before & After: Laundry Room

So it's not really a huge transformation but it's one of my favorites so far. Not necessarily my favorite to work on but more the end result. Here's a reminder of what it looked like before:

builder white and boring...

addition of DIY laundry boxes and a fun rug... 

It sat that way for a few months a couple years until a few weeks ago. My parents came up and my rock star of a dad finished what we started so long ago. A few pictures of the process:

paint plus the beadboard

then we added the trim

after caulk and more paint

and the finished product


It still needs some artwork and accessories but it will have to do for now! Another thing to cross off the list!

Saturday, July 23, 2011

DIY Accessories

So as I am frantically trying to decorate my entire house finish up projects around here, I have had to get creative. You remember I'm not working and we are operating on a *tight* budget these days. Anyway, while finishing up the upstairs bathroom, I needed some artwork and accessories to complete "the look" and it had to be cheap. So I scoured the house for things we already had and found these bathroom accessories.


I knew the brown wouldn't work with what I wanted so what did I do? Uh, spray painted of course! 


I ended up painting them grey and glazed with black so the details would pop. They turned out pretty cool.

After those were done, I needed some artwork. I really loved the colors in the towel that inspired the whole bathroom decor so I decided to make it work. I bought a hand towel and decided to frame it as "art" 


I cut a small piece for each frame and was able to use the parts I like the best. Totally customizable (today that IS a word) and inexpensive! See?!


The last two pieces of artwork that will hang in the shower part of the bathroom are still in the works so I'll post about those soon. I know I keep saying it's almost done, but seriously it is. I promise!

Friday, July 22, 2011

Friday Favorite

I know it's been SO long since I posted but just know that I've been super busy not just being lazy! 
Here's a couple pictures to (hopefully) bring a smile to your day!

She HAD to have a taste of B's lemon fruit bar...

then kept going back for more...

Happy Friday!

Friday, July 08, 2011

Friday Favorite

Trying to muster up the energy to get in the pool...apparently the heat is too much for her! 


Have a great weekend!

Tuesday, July 05, 2011

Projects, Projects, Projects

I'm slowing making progress on "the list." Last week I finished framing the rest of the bathroom mirrors, finally washed/dried/put up the towels in the upstairs bathroom, started painting some accessories, and finished baby girl's party invitations. Geez, what a busy week!

For the bathroom frames I did them the same way I did my downstairs bathroom, but this time I glazed the paint. I used this tutorial for the glazing process and kinda made it up as I went along. I think it gives the frames a nice aged/rustic look while highlighting the details of the wood. Ha, it actually sounded like I knew what I was talking about right then, didn't it?! I just thought the glaze would look better than plain white and I didn't want a completely different color in there! A quick recap of some of the accessories I worked on:

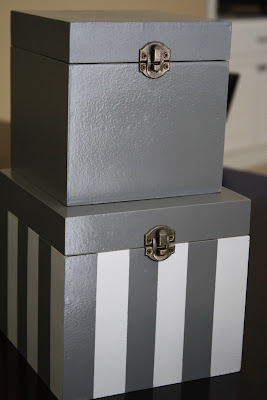
These boxes were fun to do. Here's a "before" of the lovely things:

And here's an "after":

I used my trusty primer and paint and just went to town. 

I took off the hardware so I didn't have to tape it off, 

taped it inside the lid so I didn't lose pieces, 

then primed and painted. New boxes, in no time. 

I decided to get "fancy" and add stripes to one so I had an extra step of taping it off once the first coat was dry then painting the top coat a different color. 

I know, such a rebel. I love how they turned out though.

This bathroom is just about complete. I'll post those pics soon! Next up, front room curtains. Stay tuned!

Monday, July 04, 2011

Happy 4th!

Happy 4th of July!
We spent the weekend in San Diego with my family just hanging out

being tortured by daddy swimming,

eating,

walking,

and taking pictures (of course!)

Oh wait, did I mention walking?! 

Yup, baby girl is officially a "walker" now! She was so proud of herself and we're so excited for her (and a tad bit scared now...hehe). Ok, I'm off to fully baby proof the rest of the house! Hope your 4th was fabulous!
Related Posts Plugin for WordPress, Blogger...